 English
 عربى
عربى हिंदी
हिंदीStuffing Box Packing Gland: Repacking Guide, Material Selection & Troubleshooting
Jun 23, 2026
Content
- 1 What Is a Stuffing Box (Packing Gland)?
- 2 Traditional Stuffing Box vs. Dripless Shaft Seal: Which Is Right for You?
- 3 Choosing the Right Packing Material: Flax, PTFE, Graphite, or Ultra-X?
- 4 Step-by-Step Guide: How to Repack a Stuffing Box
- 5 How Tight Should the Packing Gland Be? Torque Specs & Adjustment
- 6 Troubleshooting 5 Common Stuffing Box Problems
- 7 Maintenance Schedule: When to Repack & Inspect
- 8 Essential Tools & Safety Tips for Stuffing Box Maintenance
What Is a Stuffing Box (Packing Gland)?
A boat leaks where the propeller shaft passes through the hull. The stuffing box — also called a packing gland or packing box — seals that penetration without locking the shaft in place. It uses layers of compressible packing material squeezed between the shaft and a housing. The gland nut (or packing nut) tightens down on the packing, forcing it against the shaft to block water ingress while allowing rotation.
Three components define any conventional stuffing box: the packing gland body, the packing rings, and the gland nut. Loosen the nut and water drips in; tighten it and the drip slows. Too tight, and friction heat can score the shaft or burn the packing. The skill lies in calibrating that squeeze — tight enough to prevent flooding, loose enough to lubricate and cool the shaft with a few drops per minute.
- The packing gland body houses the rings and threads onto a hose connection.
- Flax, PTFE, or graphite rings fill the annular space around the shaft.
- The gland nut compresses the packing to form a dynamic seal.
Traditional Stuffing Box vs. Dripless Shaft Seal: Which Is Right for You?
A traditional packing gland leaks by design. A dripless seal does not. That single fact drives most upgrade decisions. A stuffing box drops about 3–10 drips per minute; a face seal system runs dry. Yet the heritage solution remains aboard thousands of vessels because it is simple, field-serviceable, and inexpensive.
Dripless seals, such as PSS or Tides Marine designs, use a carbon face and stainless-steel rotor to create a watertight barrier. They demand precise installation, a dedicated water feed line for cooling, and bellows replacement every six years. Stuffing boxes cost under $150 for a complete repack, require no external plumbing, and can be rebuilt in an anchorage with basic tools. The trade-off is constant minor leakage and more frequent adjustment.
Over five years and 500 engine hours annually, the numbers tilt in favor of a well-maintained stuffing box. Assume an initial stuffing box repack cost of $80 (premium packing) plus $20 per year for adjustment and one full repack at year three, totaling $160. A dripless seal installation averages $600–$800, with a new bellows at year six adding $200, giving a five-year cost near $700 — five times the traditional approach. Labor for a stuffing box repack averages two hours; a dripless seal installation can eat an entire weekend.
| Factor | Traditional Stuffing Box | Dripless Shaft Seal |
|---|---|---|
| Initial cost (self-install) | $80–$100 (packing & tools) | $400–$600 (seal kit) |
| Annual maintenance | Adjust drip rate every 50 hours; repack every 2–3 years | Inspect bellows, clean rotor; no routine adjustment |
| Shaft wear | Minimal with modern packing; minor scoring if overtightened | None if aligned properly; rotor setscrew can mar shaft |
| Leakage | 3–10 drops/minute (designed) | Zero (when operational) |
| Failure mode | Gradual drip increase; rarely catastrophic | Bellows tear can cause rapid flooding; rare |
| 5-year total cost | Approximately $160 | Approximately $700 |
The right choice hinges on your tolerance for bilge water and hands-on maintenance. If you cross oceans and want a dry bilge, the dripless seal earns its keep. If you prize mechanical simplicity and can spare a few minutes each month, repacking the traditional gland remains a smart, frugal path.
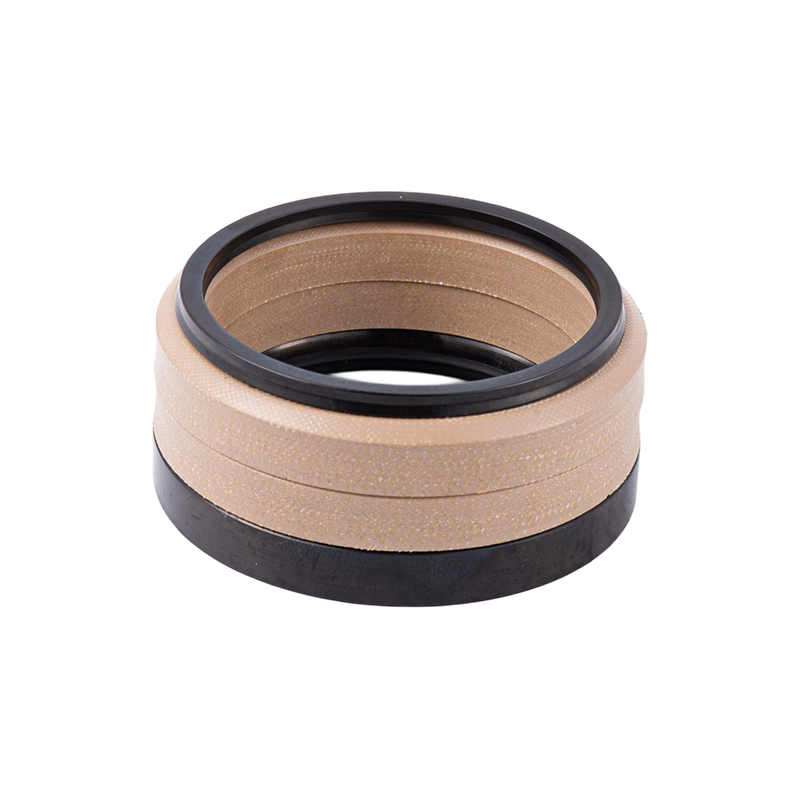
Choosing the Right Packing Material: Flax, PTFE, Graphite, or Ultra-X?
Not all packing is equal. Traditional flax packing infused with wax or tallow dominated marine applications for decades. It works, but modern synthetics dramatically reduce shaft wear and required drip rates. The decision tree starts with shaft speed and seawater temperature.
For low-speed shafts (under 1,200 rpm) in cold water, flax remains viable. Its self-lubricating wax core keeps friction manageable, but it hardens over time and demands more frequent adjustment. PTFE (Teflon) packing runs cooler, reduces friction by roughly 60% compared to flax, and tolerates temperatures up to 500 °F — a margin well beyond any sailboat’s operating range. Graphite-impregnated packing excels at dissipating heat and resists chemical attack, making it the go-to for high-speed powerboats and vessels in brackish water.
Duramax Ultra-X, a hydrophobic fiber braid, raises the standard further. It drips less, abrades the shaft less, and handles the highest shaft speeds without glazing. Lab data shows Ultra-X reduces shaft wear by 80% versus conventional flax. The premium cost ($95 for a 1-lb box covering multiple repacks) pays back in longer repack intervals and less shaft scoring. On a 1-inch shaft turning 1,800 rpm, Ultra-X will outlast flax by a factor of three.
| Material | Max Temp | Max Shaft Speed | Shaft Wear Rating (1–5, 1=lowest) | Recommended For |
|---|---|---|---|---|
| Flax (waxed) | 250 °F | Under 1,200 rpm | 4 | Low-speed auxiliaries, budget refits |
| PTFE | 500 °F | Under 2,000 rpm | 2 | Sailboats, low-maintenance installations |
| Graphite | 800 °F | Under 2,500 rpm | 3 | High-speed powerboats, hot shafts |
| Duramax Ultra-X | 550 °F | Under 3,000 rpm | 1 | Performance craft, shafts you want to preserve |
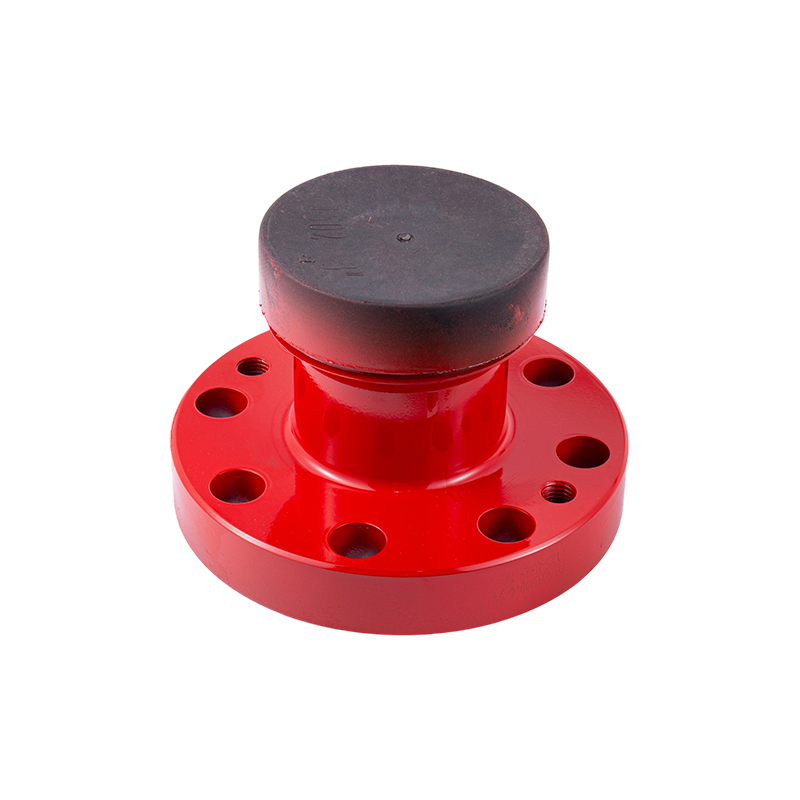
The same material-science logic carries into industrial high-pressure sealing. In hydraulic fracturing pumps, where a frac pump packing seal must hold 15,000 psi against abrasive slurry, material choice separates a 50-hour service life from a 500-hour one. Whether on a propeller shaft or a plunger, the packing material dictates system reliability.
Step-by-Step Guide: How to Repack a Stuffing Box
Repacking a stuffing box is a two-hour job that requires calm nerves, a pick set, and the correct size packing. Do this in the water — you need the sea to pressure-test the seal afterwards. Shut the raw-water valve to the engine and relieve any pressure in the hose before loosening the gland nut.
- Gather tools: adjustable stuffing box wrenches (or smooth-jawed slip-joint pliers), packing extractor picks, a caliper, sharp knife, and non-perforated AWAB 316 stainless hose clamps. A pipe wrench damages the nut; use purpose-made wrenches or cover jaws with tape.
- Loosen the thin lock nut and back it completely away from the gland nut. Unscrew the gland nut until the packing rings are exposed.
- Dig out all old packing rings with picks. Count the rings as you remove them — three to five rings are typical, but you must match the original stack height. Wipe the packing gland bore clean with a rag; no dirt or hardened wax residue should remain.
- Measure shaft diameter with calipers. Cut four or five new packing rings to exact length: (shaft diameter × 3.14) plus a 1/16-inch overlap for compression. Cut each ring with a sharp blade at a 45-degree bevel, not square — this lets the ends blend under pressure.
- Insert the first ring into the gland, pressing it fully below the threads. Set the cut bevel downward; the split should face up. Tap gently with a drift to seat the ring flat. Each successive ring must have its cut 90 degrees offset from the previous one to prevent a straight leak path.
- Hand-tighten the gland nut until it contacts the packing. Turn on the raw-water valve and start the engine. An assistant watches the bilge while you slowly tighten the nut with a wrench. Stop as soon as the drip rate drops to 4–6 drops per minute with the shaft spinning in forward gear. Tighten in 1/8-flat increments and wait 30 seconds between adjustments.
- Lock the thin nut against the gland nut by turning it toward the gland nut with a wrench while holding the gland nut steady. Both nuts must be tight against each other — a loose lock nut is a sinking risk when you shift into reverse.
- Run the boat in forward and reverse for five minutes at idle. Recheck drip rate. A properly packed gland should be warm to the touch, never hot. If you can’t hold your hand on it for five seconds, back the nut off one flat.
During disassembly, inspect the shaft for scoring. A grooved shaft will never seal well regardless of packing material. If the shaft is worn beyond 0.010-inch depth, plan on a shaft repair or replacement before relying on the boat.
How Tight Should the Packing Gland Be? Torque Specs & Adjustment
No torque table replaces the drip-watch method, but starting points eliminate guesswork. For a 1-inch shaft, initial gland nut torque after hand-tight should be 8–10 ft-lbs, yielding roughly 6–10 drops per minute at idle. As the packing beds in over the first 10 hours, back the nut off incrementally to maintain 3–5 drops per minute.
On larger shafts, torque scales: a 1.5-inch shaft calls for 12–15 ft-lbs; a 2-inch shaft takes 15–18 ft-lbs. These values are for graphite or PTFE packing. Flax requires about 20% less torque because it compresses more readily. Never exceed 25 ft-lbs on any recreational shaft — the hose or stern tube can crack.
| Shaft Diameter | Initial Torque (ft-lbs) | Target Drips/min (Forward Idle) |
|---|---|---|
| 3/4 in | 6–8 | 4–6 |
| 1 in | 8–10 | 3–5 |
| 1-1/4 in | 10–12 | 3–5 |
| 1-1/2 in | 12–15 | 2–4 |
| 2 in | 15–18 | 2–4 |
Adjustment is a feel job. If the drip stops entirely underway, the packing is burning. If the bilge runs every cycle, the packing is too loose. The goal is a slow, rhythmic drip that keeps the shaft and packing cool. A small change — just one flat on the nut — can swing the drip rate from zero to 10 per minute. Tightening too quickly glazes the packing surface and starves the seal of cooling water.
In heavy-duty fluid end assemblies, precise torque is equally critical. Over-tightening a frac pump flange or packing nut can deform the seal and induce leakage under pressure. The same incremental tightening discipline applies whether you are working on a sailboat or a 5,000-hp frac unit.
Troubleshooting 5 Common Stuffing Box Problems
| Problem | Likely Cause | Solution |
|---|---|---|
| Constant heavy drip (over 20 drops/min) | Worn packing, cut rings installed without offset, or gland nut backed off. | Remove and replace packing with correct offset. Ensure cut ends are beveled. Clean bore before repacking. |
| Shaft runs hot to touch after 5 minutes | Packing too tight. No cooling water entering gland. | Loosen gland nut one flat. Verify raw-water valve open and hose free of kinks. Repack if packing glazed. |
| No drip after initial adjust | Packing overtightened or gland nut cross-threaded. | Loosen nut until slow drip resumes. Replace packing if it has hardened from heat. |
| Loud squeal or rubbing noise | Shaft misalignment or foreign object lodged in packing. | Stop engine. Rotate shaft by hand to feel for grit. Remove packing and inspect. Verify engine alignment. |
| Packing extrudes between shaft and nut | Excessive clearance or worn shaft. Packing material too soft for shaft speed. | Measure shaft-to-bore clearance. Upgrade to harder packing (graphite or Ultra-X). If clearance exceeds 0.010 inches, consider shaft sleeve repair. |
Most problems trace back to improper installation or skipped maintenance. Cutting rings square instead of beveled creates a persistent leak path. Forgetting to offset the cuts by 90 degrees will cause excessive water ingress, no matter how tight the nut. And never reuse old packing — once compressed, PTFE or graphite loses its resilience and will not conform to the shaft for a second sealing cycle.
Maintenance Schedule: When to Repack & Inspect
A traditional stuffing box demands seasonal attention. At 200 hours, check the drip rate with the shaft in gear and feel the gland for temperature. At 500 hours, remove the packing for inspection — even premium Ultra-X will show some compression set after that interval. Replace packing immediately if you find hard glazed rings, blackened material, or deep shaft scoring.
Winter layup presents specific hazards. Freezing water trapped inside the gland can split the bronze body. Drain the hose and push a small amount of waterproof grease into the packing after the last run to displace moisture. In the spring, the old packing may have stiffened; replace it if you measure more than 0.5 mm of permanent compression compared to a fresh ring.
- Drip rate check: every 50 engine hours.
- Shaft temperature check: every run (should be warm, not hot).
- Hose and clamp inspection: every 6 months. Replace clamps if any corrosion or perforation exists.
- Full repack: every 500 hours or 2 years, whichever comes first.
- Lock nut tightness: before first launch of season and after any heavy reverse operation.
Essential Tools & Safety Tips for Stuffing Box Maintenance
The right tools prevent damage to brass nuts and make extraction quick. An adjustable stuffing box wrench or a large pair of flat-jawed pliers (with smooth faces) should be your primary tools. A packing hook – a bent steel pick – removes old rings without scoring the bore. Keep a set of non-perforated AWAB 316 stainless hose clamps aboard. The perforated style found in hardware stores creates stress risers that can crack the rubber hose and let the sea in.
- 2 adjustable stuffing box wrenches or smooth-jawed pliers.
- Packing extraction hook and dental picks.
- Digital caliper for precise ring length.
- Sharp utility knife with replaceable blades.
- Non-perforated AWAB hose clamps in the correct diameter.
- Waterproof grease for winter preservation.
Three safety rules should never be compromised. First, always perform a reverse-gear test after locking the nuts — shift into reverse with the engine idling while watching the gland nut. If it moves, the lock nut is not tight, and the nut could unscrew under power, allowing a massive leak. Second, inspect the rubber hose connecting the gland to the stern tube for cracks or bulges; a burst hose will sink the boat faster than the bilge pump can cope. Third, ensure the shaft grounding wire is securely attached; a lost ground permits galvanic corrosion that can eat through the shaft within a season.

